
" Flaying the Beast "
Or,
"More than you ever wanted to know about basic butchery"
At some point, I really wanted to write a blog discussing the fine art of beef striploin butchery. No time the present, I say.....So, I took some pictures recently of the steps I took when I actually prepared a raw beef striploin, and turned it into steaks and usable trim. Maybe you've had a hankering to purchase one of those daunting whole AAA striploins in the fresh meat department at Costco, and were wondering, deeply, how you may go about breaking it down? Fear not. I have arranged this easy to follow tutorial, for your degustation and perusal. Fair warning though; it does get quite bloody, and you will need several tools you *may* not have in your home, or within easy procurement. If the sight of blood and animal tissue offends you, please feel free to re-read my previous blogs, and move on. :)
First off, you will require a sharp boning knife and/or a carving cimiter, a large cutting board, lots of paper towels, or a clean absorbent towel or rag that you would consider disposable after this. The cimiter is the desired blade of choice for this, but the more common boning knife works just fine in a pinch. Just make sure they are very sharp. Nothing in the kitchen is more unsafe than a dull knife. Why? You overcompensate for the lack of precision cutting with what turns into frustration and reckless force...this is bad. So, sharp knives only, please!
What I have pictured here is your standard 0x1 Reserve Angus beef striploin. It weighs in at an average of 11 lbs....the perfect size for cutting steaks of proper length and thickness. Signatures of quality beef striploins are: size -- not too big or small, eye -- not too large or small, fat -- milky white and solid, and a 1/4" fatcap, and marbling -- prevalent. I will describe what marbling is a bit further on. Striploin is one of the most revered cuts of beef, coming from the shortloin, which is between the prime rib section and the sirloin section, working nose to tail. Have a quick look at the diagram at the top of the page for reference.
To begin, make sure you have a clear and clean work surface. Place a damp cloth under your cutting board to prevent sliding. Remove the striploin from the vac-pac bag it comes in. I normally flip it over revealing the underside, and run my knife gently along the length of the bag, just enough to smake an opening, but not enough to damage the underlying meat. Grab the loin firmly, and pull it out of the bag, making every attempt to leave most of the blood behind, inside the bag. Discard the bloody vac-pac bag, and place the strip down on your cutting board. Give it a good wipe with plenty of paper towels, or your cloth or rag, to sop up any extra blood. What you should have is illustrated below. Notice how the "tail" of the striploin is oriented away from you. The tail side is the side that slopes downwards. The backstrap is somewhat flat and squared off in section.

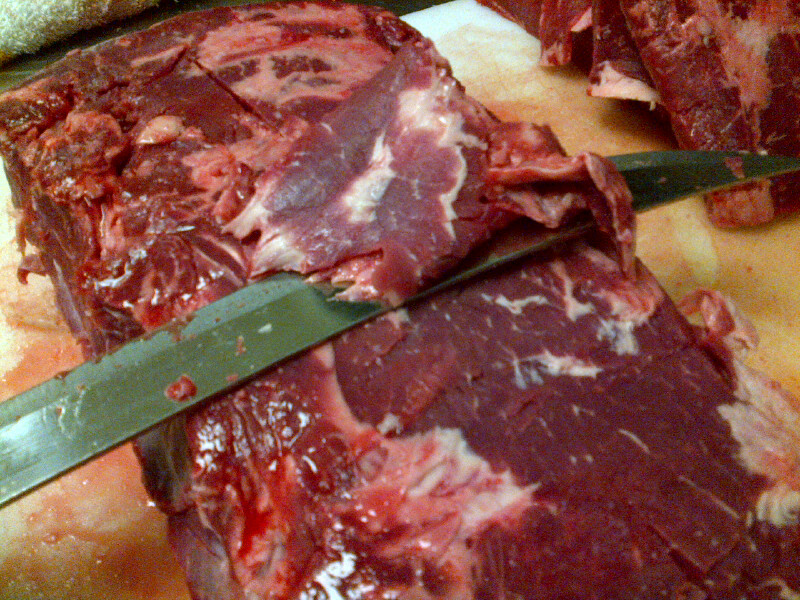
The first cut we will make is to remove the backstrap. The backstrap is the thick chord of elastin and other connective tissue that runs along the back of every beef striploin. You want to remove it, as it is very chewy and largely inedible. Removing this is called the "New York" cut. I start about 2" in from the back, and cut towards the outside, then straight down, to effectively remove all of it....illustrated below.

Next, turn the striploin around so the tail is now facing you. I choose to remove most of the tail, as the excess fat rendering just causes flare-ups on a grill. Run the knife lengthwise down the length of the strip as illustrated below. You can see the shape of the classic New York steak being revealed.

What you have left should be this. You can choose to remove some of the excess fat-cap if you wish. I remove some of it, but not all. Most "better" strips come with 1/4" of visible fat-cap, which is within normal tolerance. I just shave off some of it....just remember to cut away from you, not towards!

Next, turn the striploin over to expose the underside. there is some fine trimming to do here. The white bits are inedible connective tissue elastin) and silver skin. Leaving this on will make the resultant steak very chewy.

When that is done, flip the striploin back over, with the tail part oriented towards you, backstrap facing away from you, as illustrated below. Now fun part begins! Now you can cut steaks to your liking, as thick or thin as you like. Cutting steaks by weight accurately, while minimizing waste and mis-cuts, takes a great deal of experience. The steak I have cut is an 8 oz. steak. It is about 10-12mm thick. This will vary by striploin, as none are ever truly alike. Keep cutting steaks until.....


What you will be left with is this: Usable Trim. It is great for a multitude of things....stirfries, curries, fast fry steaks, stewing beef, etcetera.


Now, *that* is marbling. It also costs $35-$40 or more per pound, whereas the strip I butchered comes in at about $8 per pound. It may look enormously fatty, but the cooked version is super tender and succulent. The intra-muscular fat aids in "self-basting" of the steak during the cooking process. Steaks of this caliber are often served RARE and cooked over very high heat, for a good sear, which locks in the juices.
I hope you enjoyed this mini-lesson of basic striploin butchery. If you followed along correctly, no doubt you will have some great steaks to grill. A simple marinade of chopped garlic, sea salt, cracked black pepper and rosemary leaves works great, with a splash of red wine and a little olive oil to coat.
As a footnote, I also make use of the inedible trim (the backstrap, the tail, elastin trim etc.)...I roast it in a hot oven on a tray til it's sufficiently browned, then I simmer the roasted trim in enough water to cover it in a large pot. I deglaze the pan with red wine, add the drippings to the pot, with some mirepoix (diced celery, carrots and white onion), and some bouquet (stems of parsley, bay leaves and whole black peppercorns). I let this simmer for a few hours,or even overnight on LOW sometimes, then I strain it and use the resulting liquid as a base for gravy, au jus or even soup. French Onion soup comes to mind here. I will add a recipe for a *killer* French Onions Soup after the jump. The flavour is much better, more homemade, than using overly salty beef base or bouillion cubes.
Have fun, and remember: ALWAYS CUT *AWAY* FROM YOU!
And don't run with scissors, too.
Cheers
D
No comments:
Post a Comment